7 Steps to Setup Google Tag Manager
The wonderful thing about Google Tag Manager (GTM) is that once this is setup on your site, you can easily manage tags, create new tags, and integrate with campaign management tools.
This article will go through the initial 7 steps for setting up GTM on your website.
1. Create an account in GTM
When you land on the GTM homepage, click on "Create Account" on the top right of the page.
Enter your account name, container name, platform type, and click on "Create".

2. Get snippet to place on website
You will see a tracking snippet pop-up once you after you hit "Create" - ask your developer to place this tracking code (image below) on your website and follow the instructions given on the placement locations in head and body.
![]()
3. Test the debugger
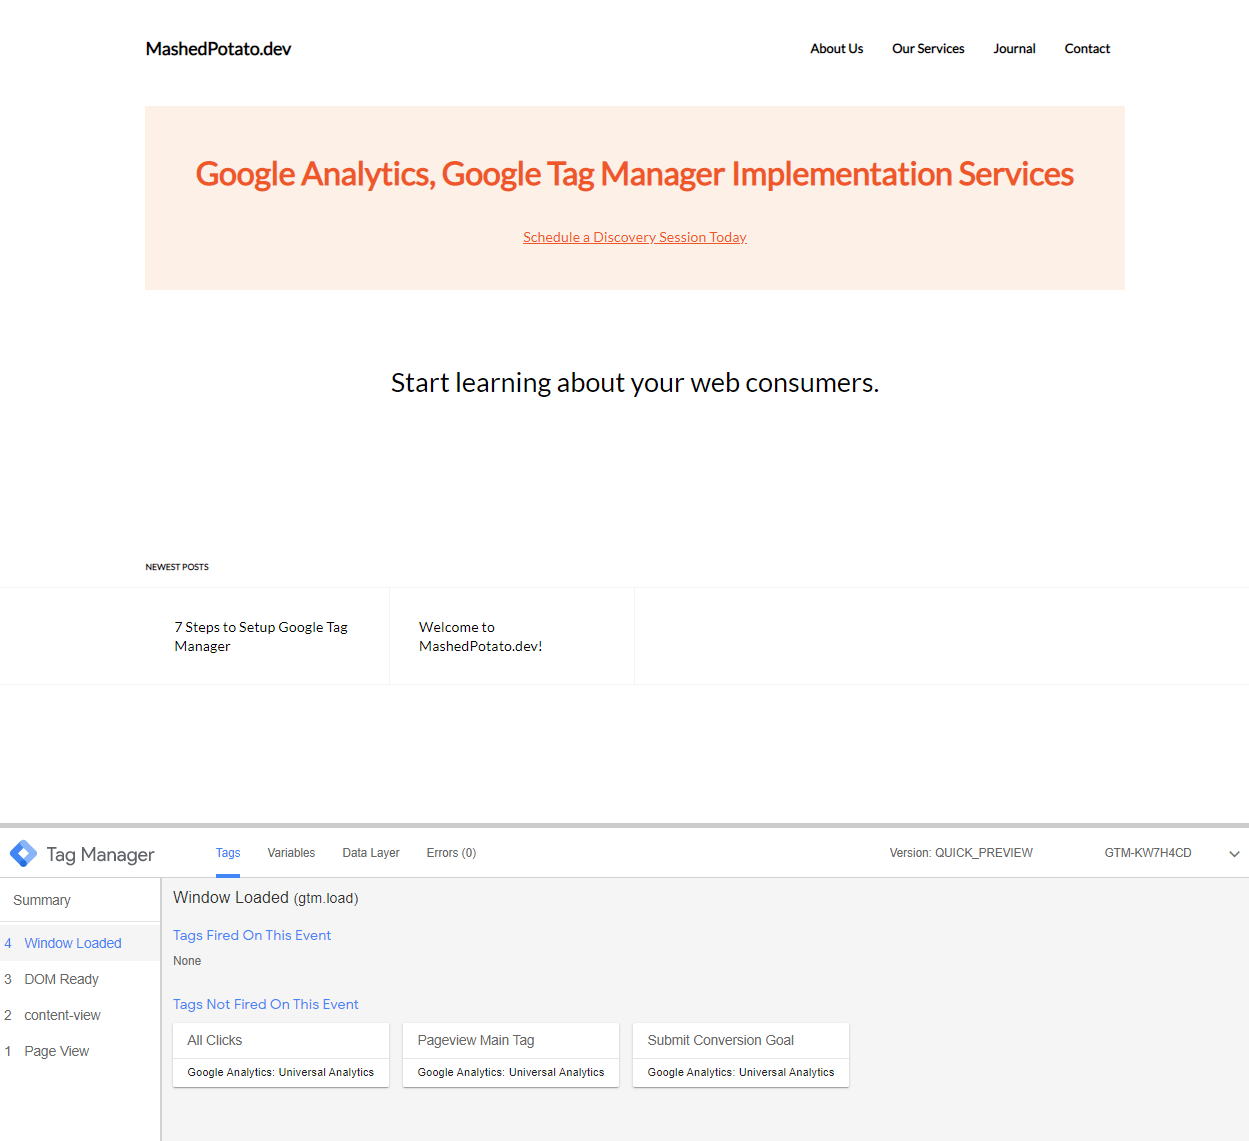
Once the tracking snippet is placed, you can click the "Preview" button (top right corner of GTM workspace) to see if the snippet is working or not on your website. Click on "Preview" and then navigate to your website. If you are already on your site, refresh your page.
The GTM debugger window would appear at the bottom of your site if the tracking snippet is placed correctly.

4. Create a Google Analytics (GA) account
Go to the GA homepage > "Admin" > "Create Account". An account will be created, along with a property and a view.
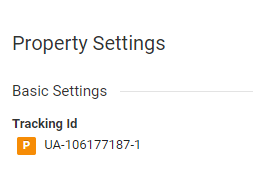
Navigate to the GA Property section and grab the UA number (image below), you will need this for the next step - to tell GTM where to send data to.

5. Create a pageview tag in GTM
In the "Variable" section of GTM, create a "Google Analytics Settings" variable. Insert the UA number from GA. You can set various settings here as well such as custom dimensions (data values that are customized for your business), or cross domain tracking, or customized metrics, etc. To get started though, you would just need the "Tracking ID" section filled out with the GA UA number.
In the "Tag" section of GTM, create a "Google Analytics: Universal Analytics" tag type. Select the "Tracking Type" to "Page View". In the "Google Analytics Settings" choose the "Variable" that we just created.
Add a trigger for All Pages Page View. If you have a single page application, you may need an All History Change History Change trigger as well.
6. Test the pageview tag with the GTM debugger
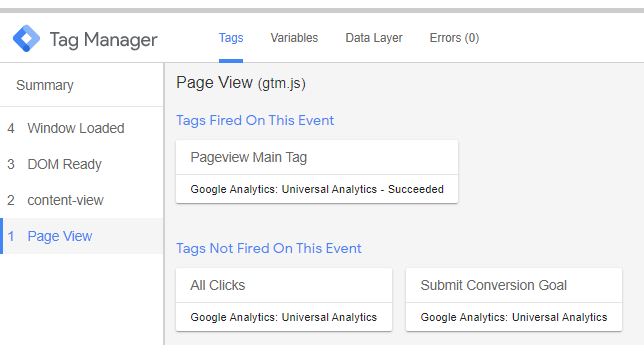
Click on "Preview" again at the top right of GTM page to refresh the debugger to include the pageview tag that you just created. Refresh your website's page again.
The pageview tag should be firing one time per page viewed, or URL link change. The tag would show up under the section "Tags Fired On This Event" if working correctly.
The expected return of the tag fired on event is one per page.

7. Check for data flow in GA and publish GTM
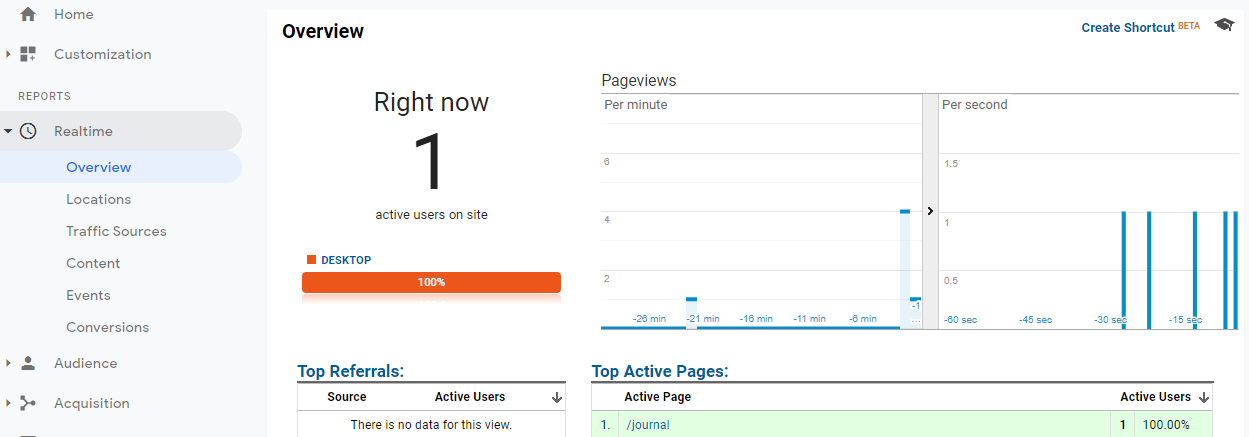
Before we call it complete, check for data flow into the GA account. Navigate to your GA account and go to "Realtime" > "Overview". The GTM is only the tag management piece, GA is where the web user data lives and where you would pull the data from.
If you see activity here, the tracking is working and you can verify the pageview tracking implementation with the page path (of the page you are currently on) and say yes, this is the page I am currently on and the page path shown here is the expected data value.
Click the "Submit" button in GTM (next to the "Preview" button) to start collecting production web user data.

Conclusion and next steps
There are a wide span of user engagement and impression data that you can collect on your website(s), such as submission to a newsletter, order placement, and conversion goals you can setup with GTM and GA.
You can also track what product impressions are seen by the user in their viewport, how much of the article was read, and percent played on a video.
Campaign tracking and making the connection of an user who came to your site based on a campaign ad copy, and how far they made into the funnel, and did they convert.
A/B testing capability, integrated with the events that you setup with GTM linked with Google Optimize will allow you to message to users in different geographic locations.
With these 7 GTM setup steps listed above you will have the pageview tracking complete. The pageview tracking will let you see data such as session count, user count, time on site. Additionally, you will be at a great place to be able to integrate and to implement other marketing products and manage tracking setup with ease.